> ## Documentation Index
> Fetch the complete documentation index at: https://docs.numeral.com/llms.txt
> Use this file to discover all available pages before exploring further.
# Chargebee
> Start collecting sales tax on your Chargebee invoices using Numeral's tax engine.
This guide walks you through connecting Chargebee to Numeral so that sales tax is automatically calculated and applied to your invoices.
***
## Getting Started
1. In your Numeral dashboard, click **Connections** on the left-hand menu, then select **Chargebee**.
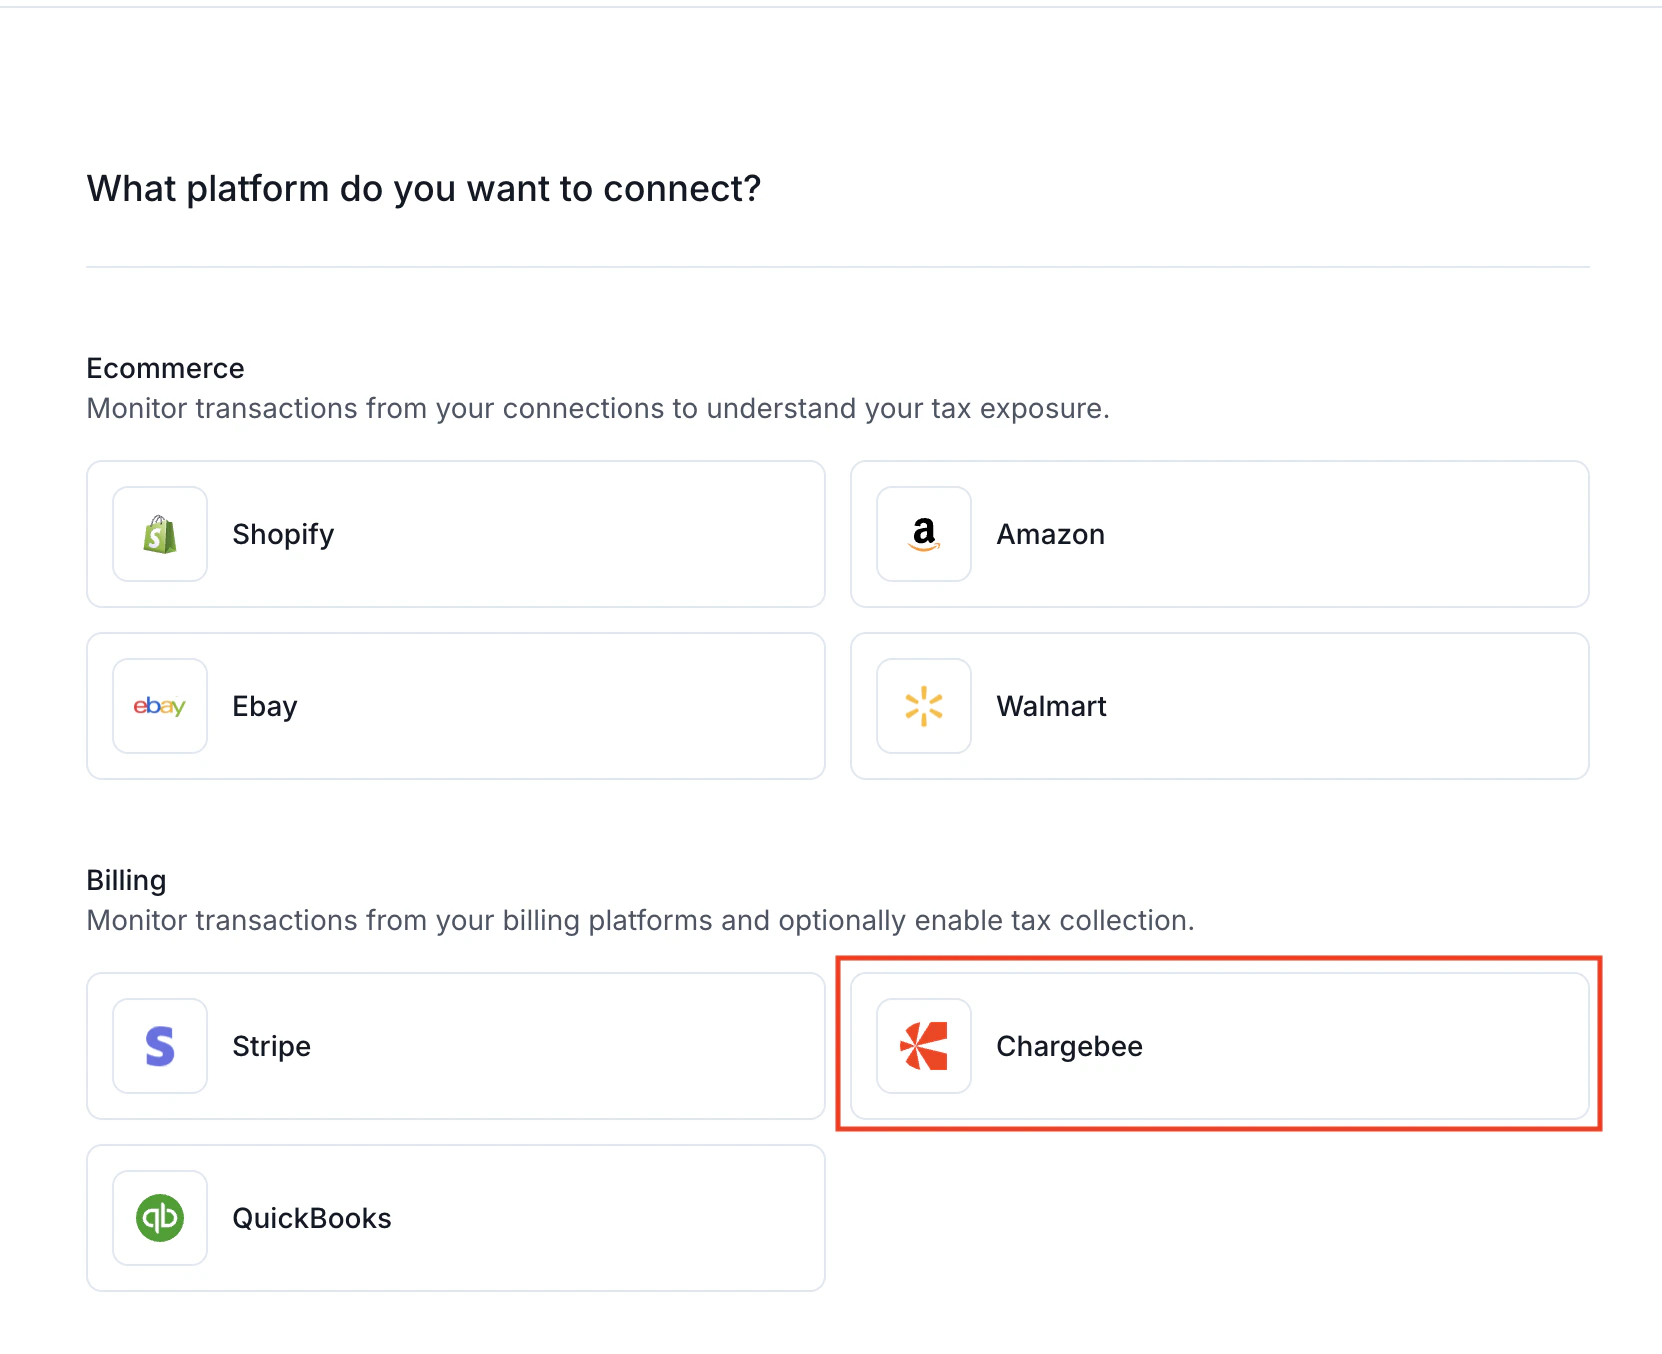 2. A setup window will open to begin configuring your Chargebee integration.
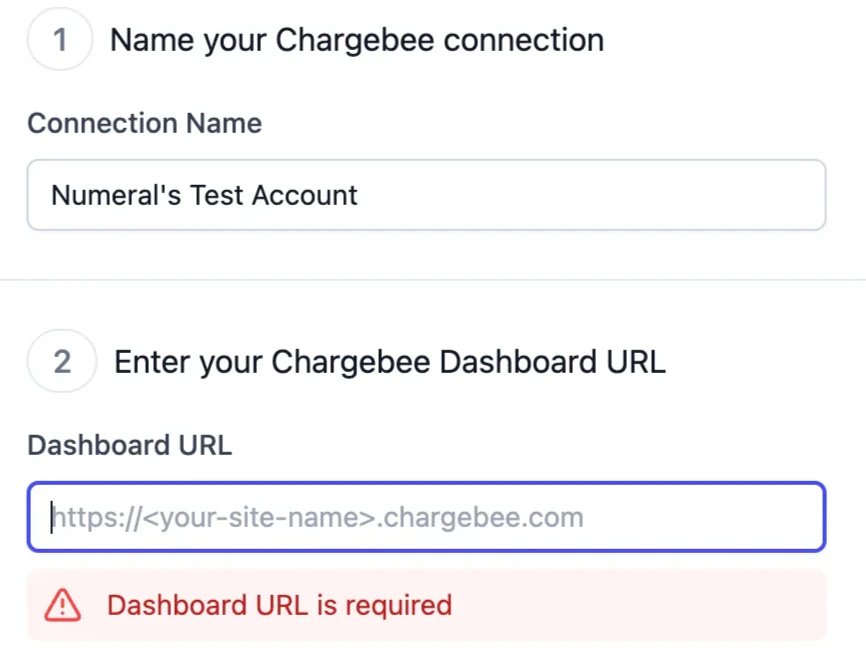
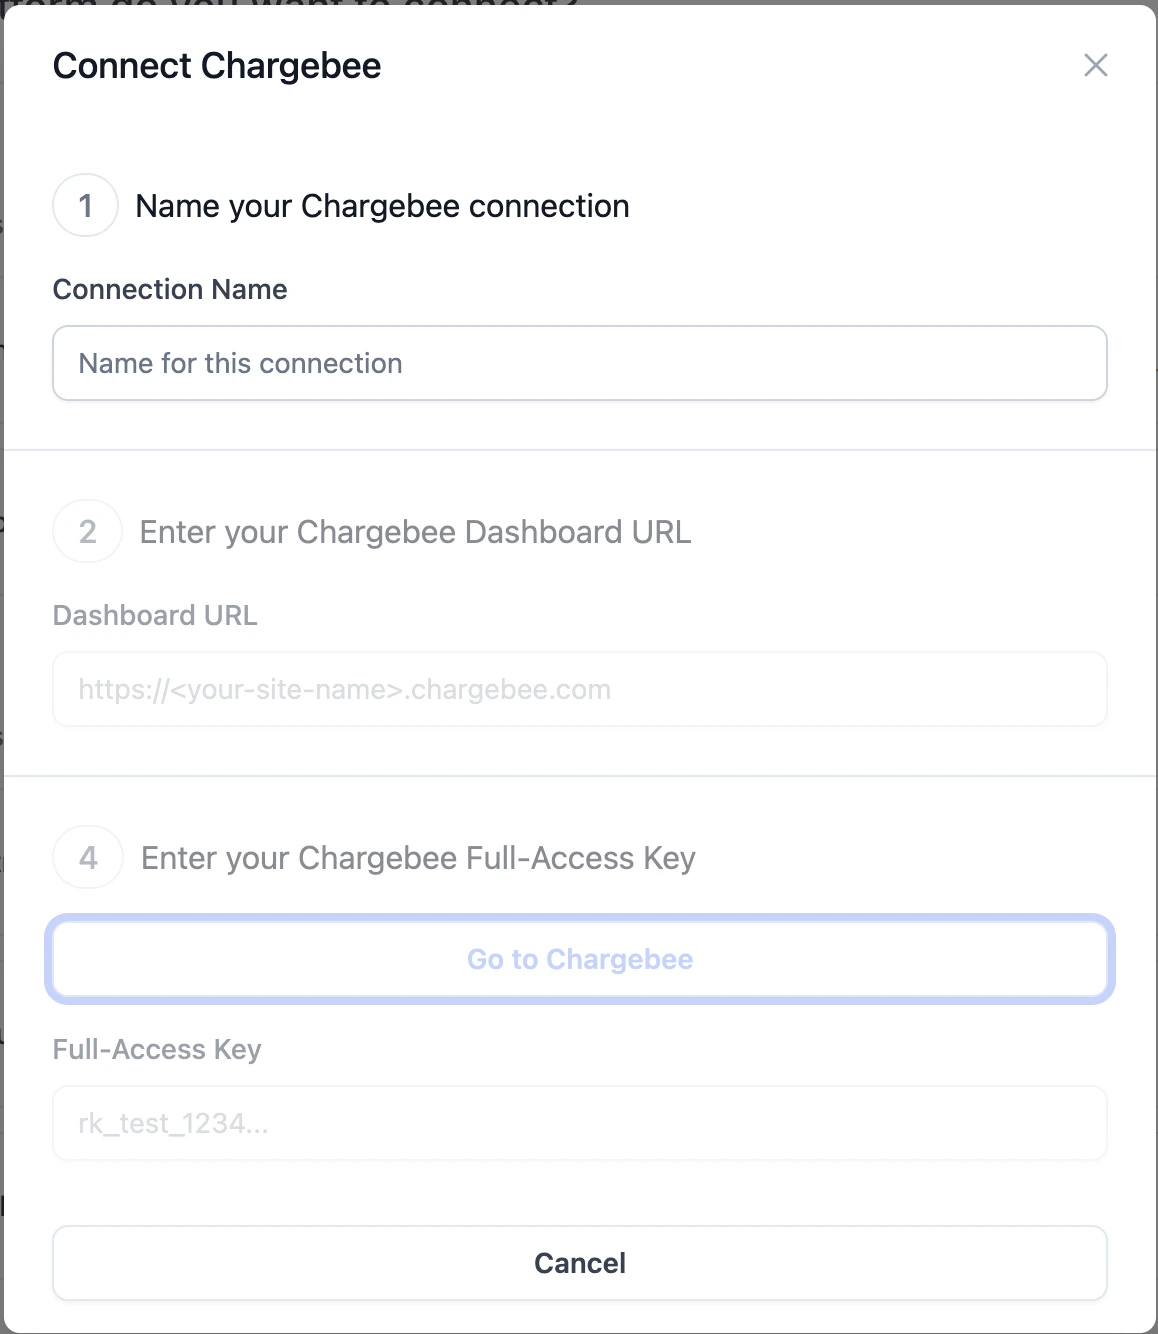 3. Name your connection, then navigate to your Chargebee dashboard to copy your site URL.
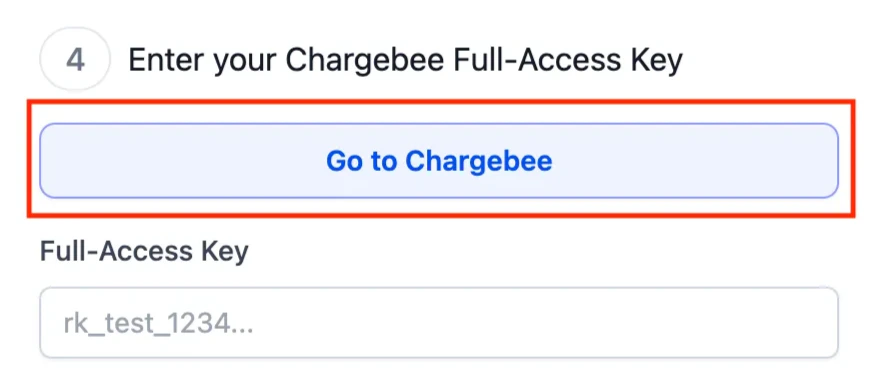
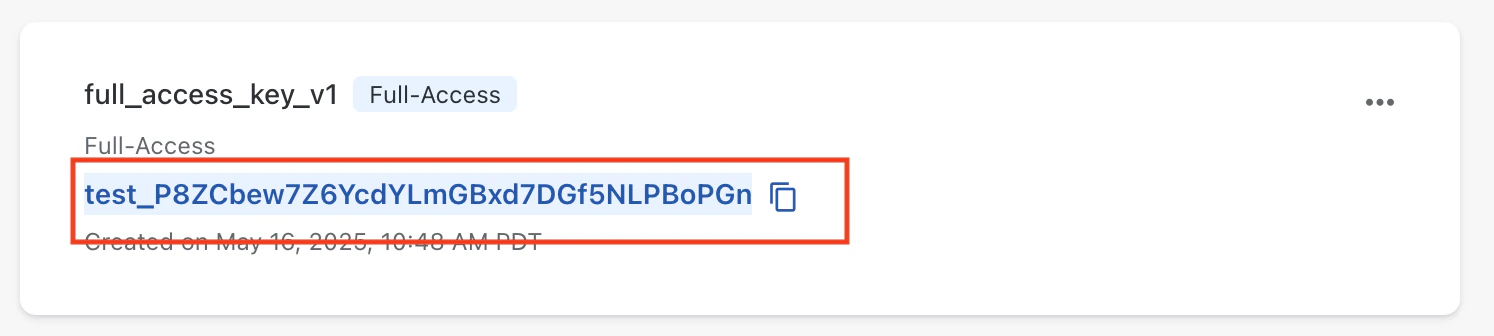
 4. Navigate back to Numeral to enter your Chargebee Full-Access Key. Click **Go to Chargebee**, locate the opened Chargebee tab, and copy your `full_access_key_v1`.
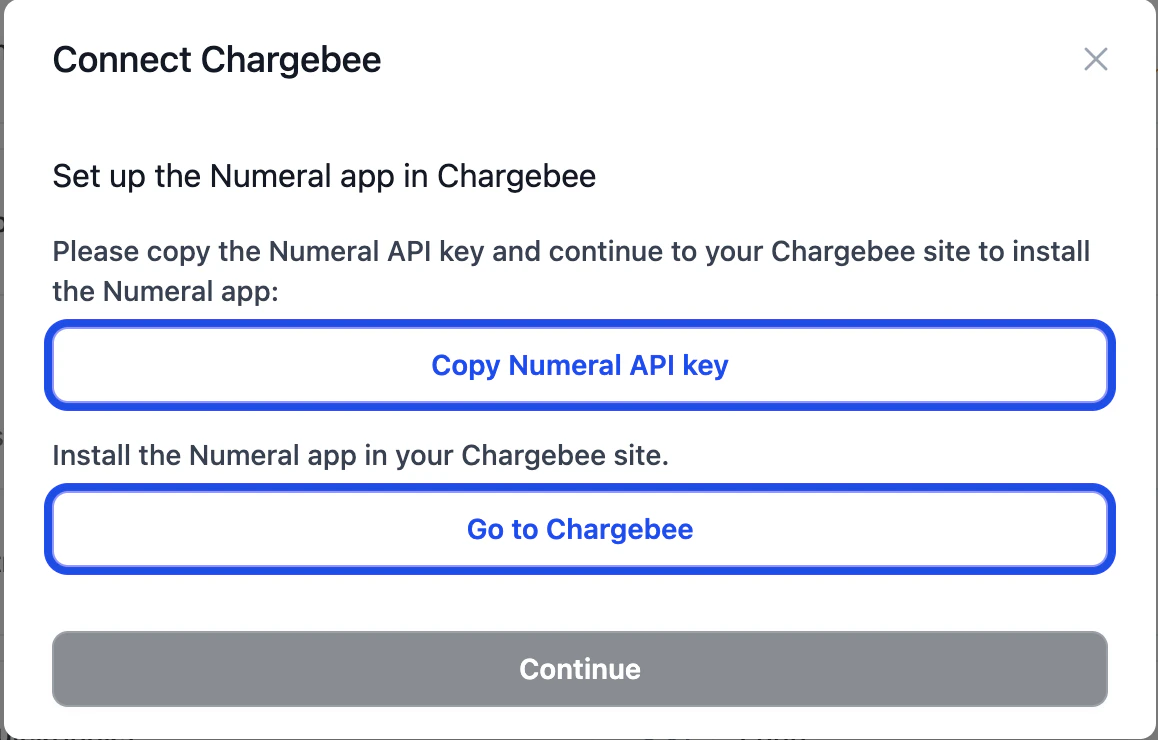
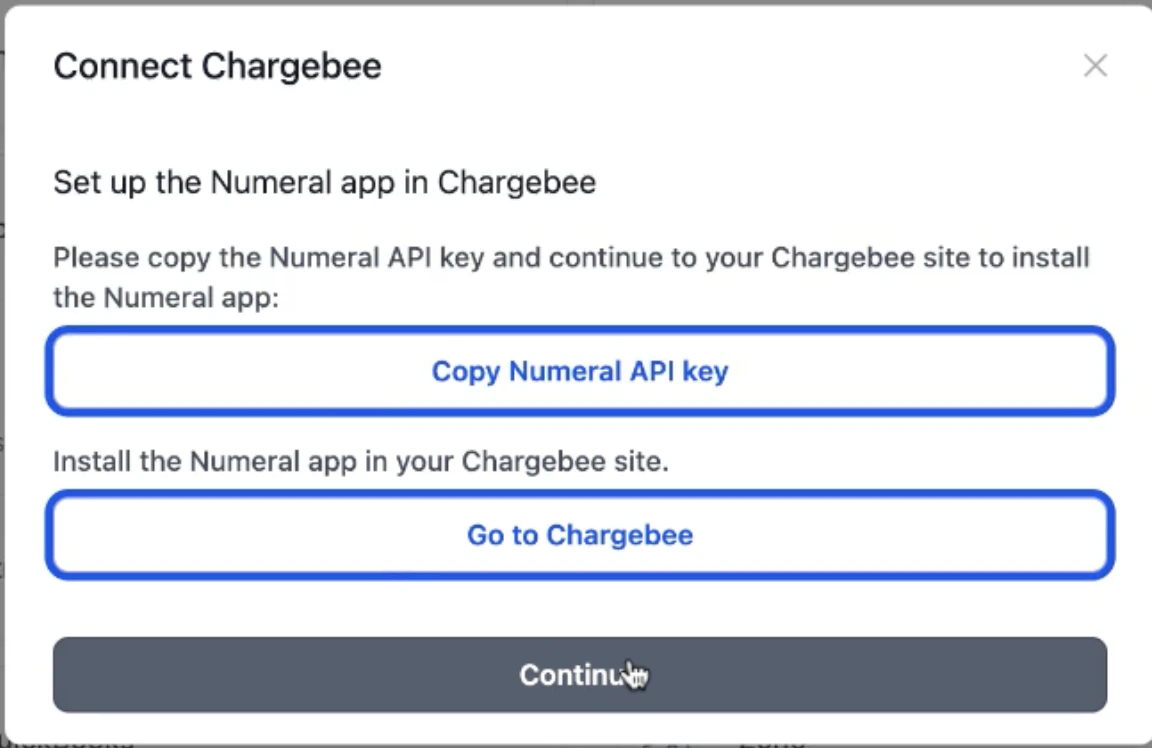
 5. Once you click **Connect**, a new popup will appear to add the Chargebee webhook. Copy the Numeral API key and click **Go to Chargebee**.
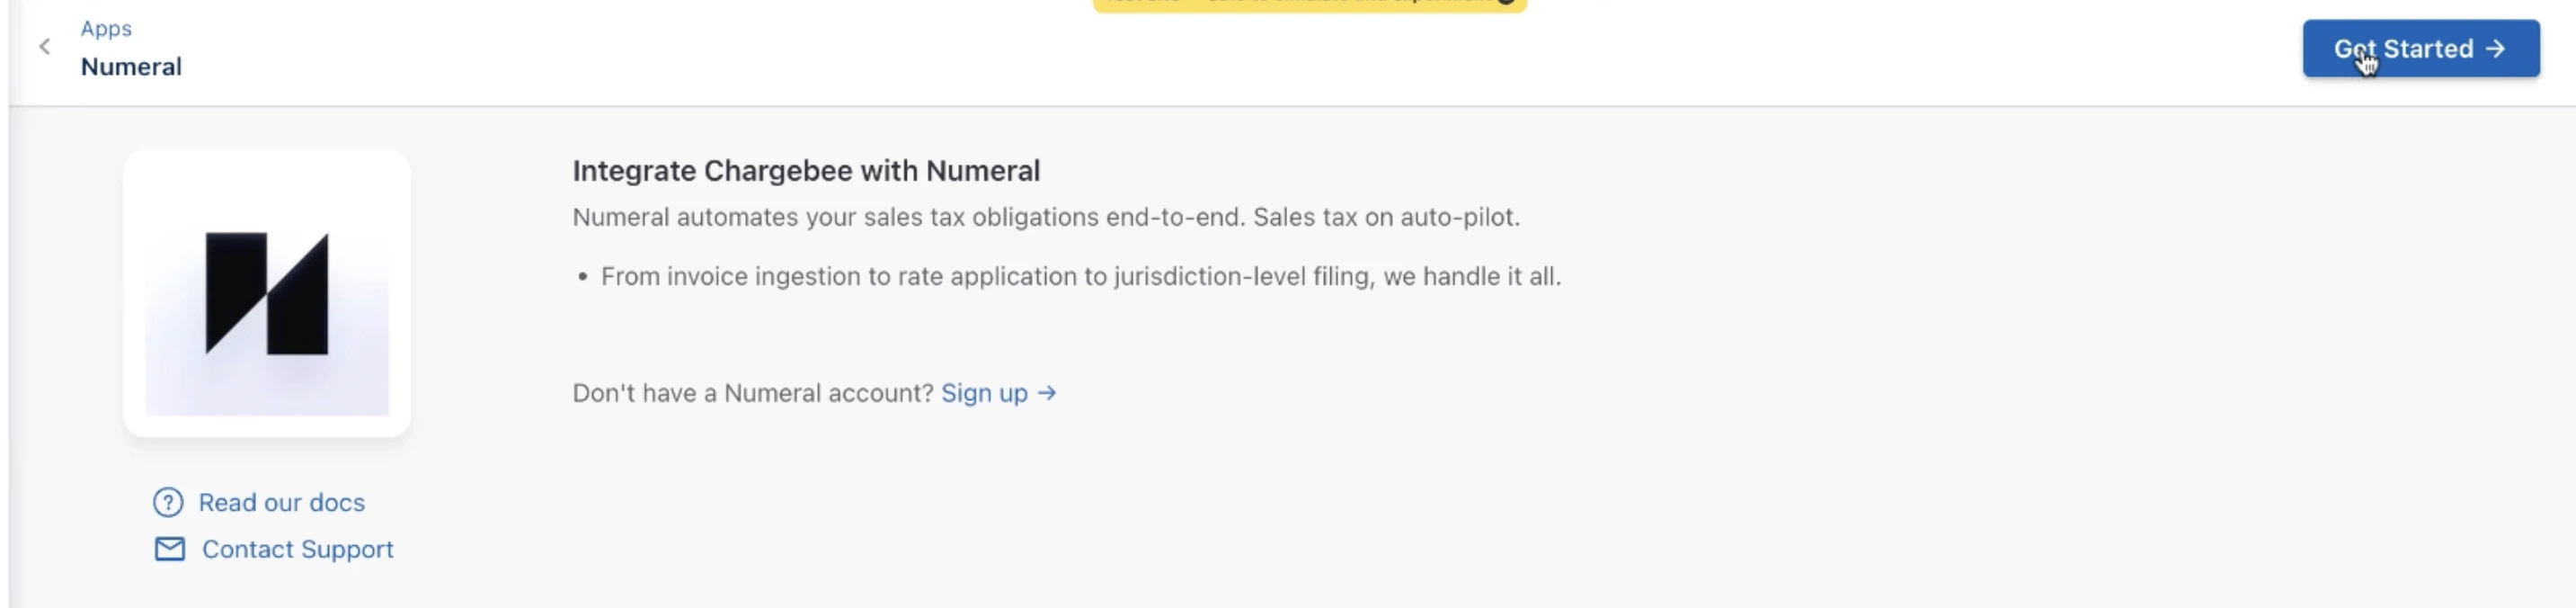
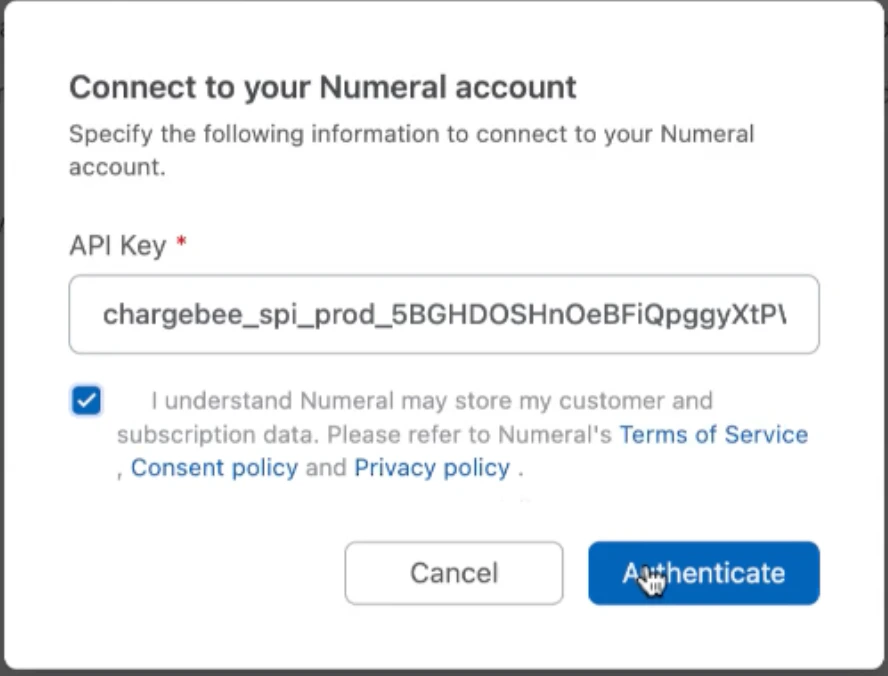
 6. A window in Chargebee will appear to integrate Chargebee with Numeral. In the top right corner, click **Get Started** to open a box to enter the Numeral API key, check the checkbox, then click **Authenticate**.
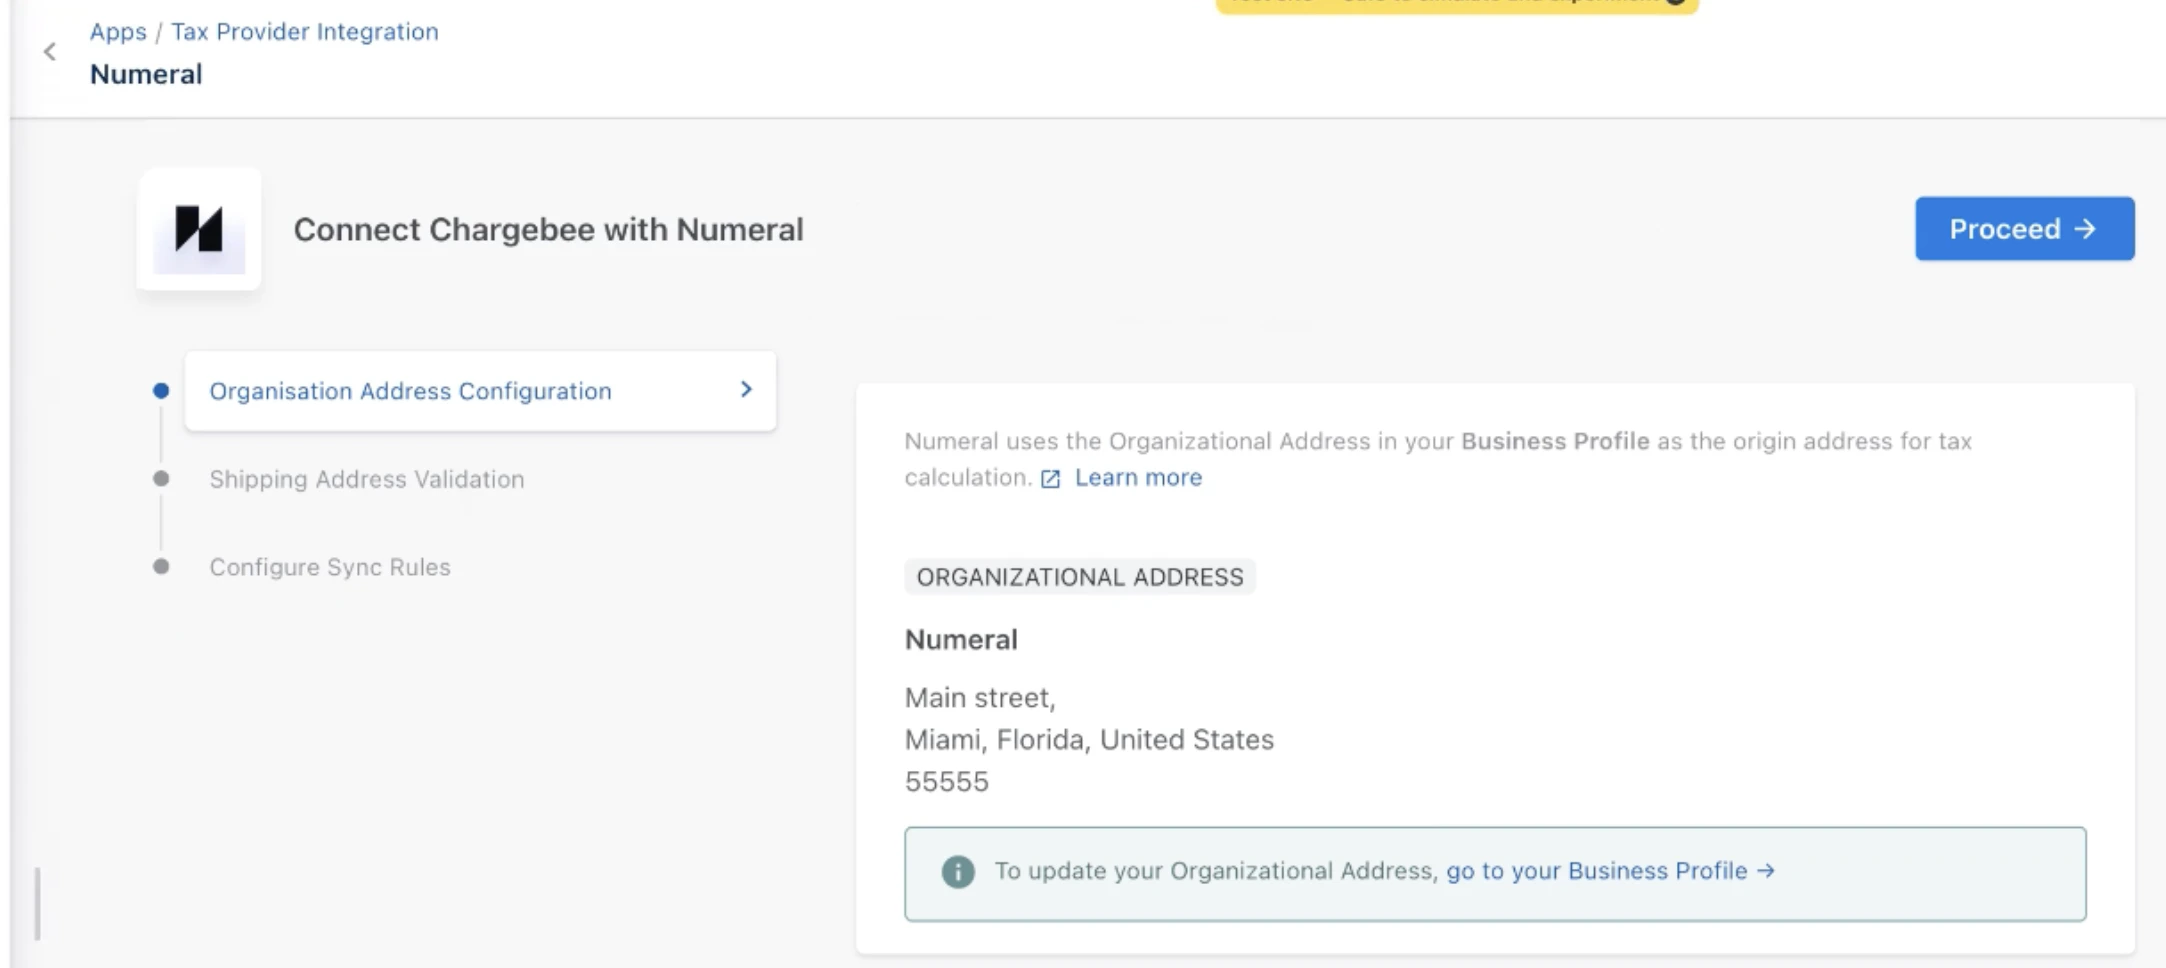
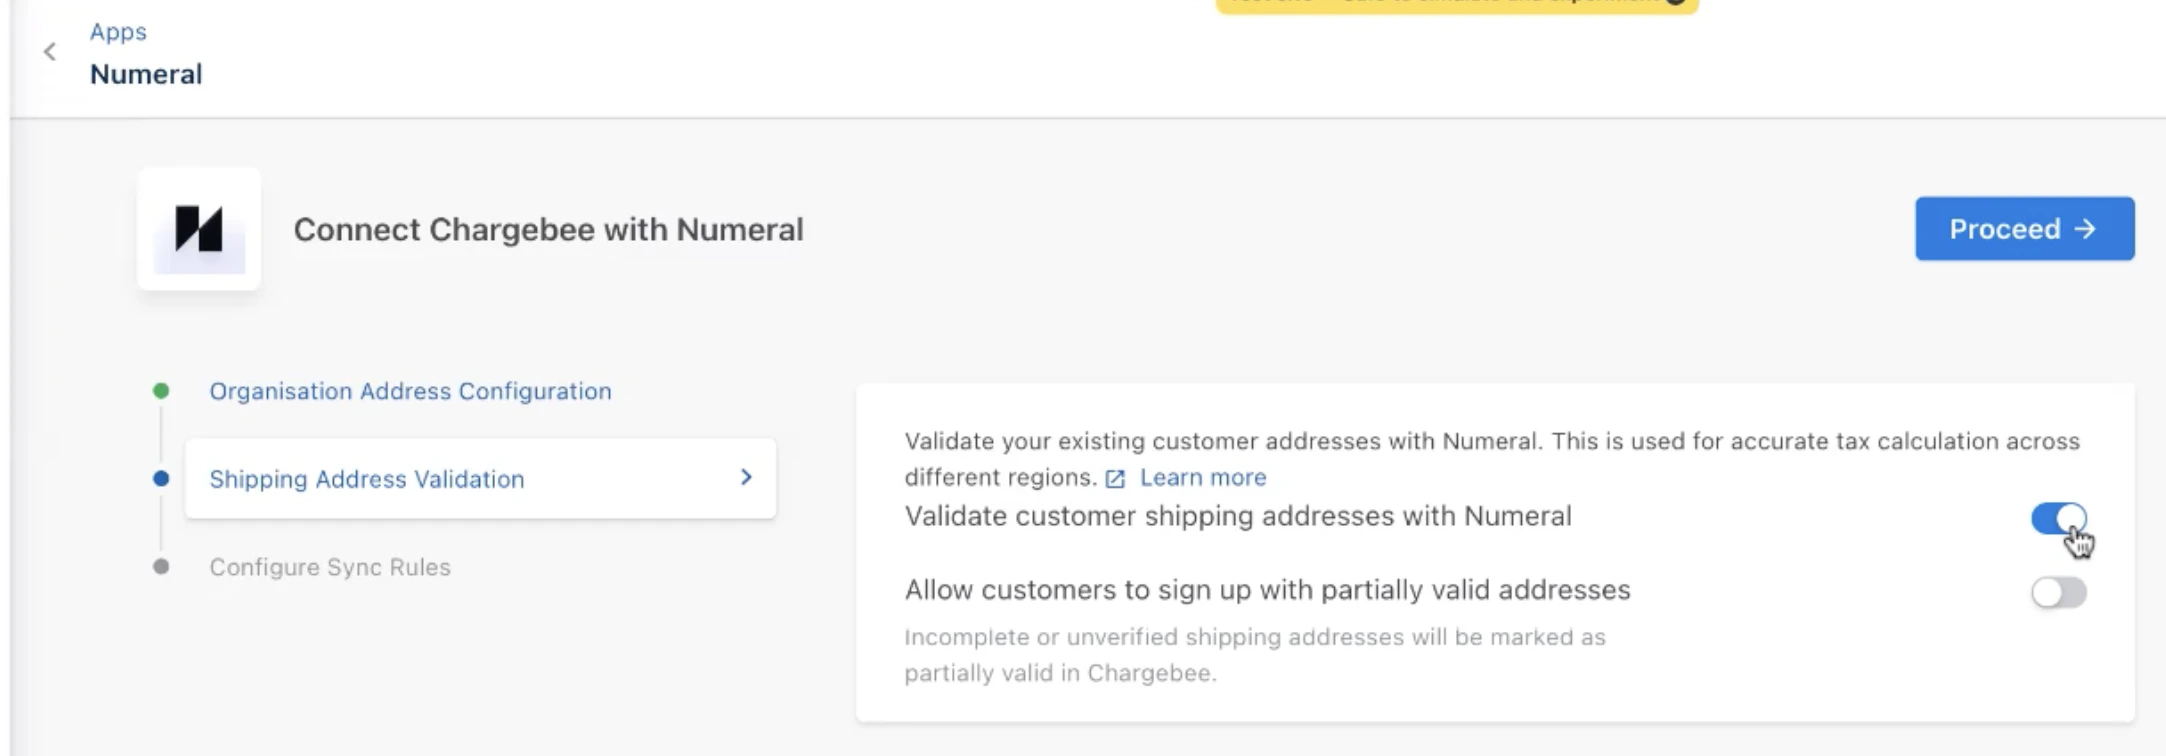
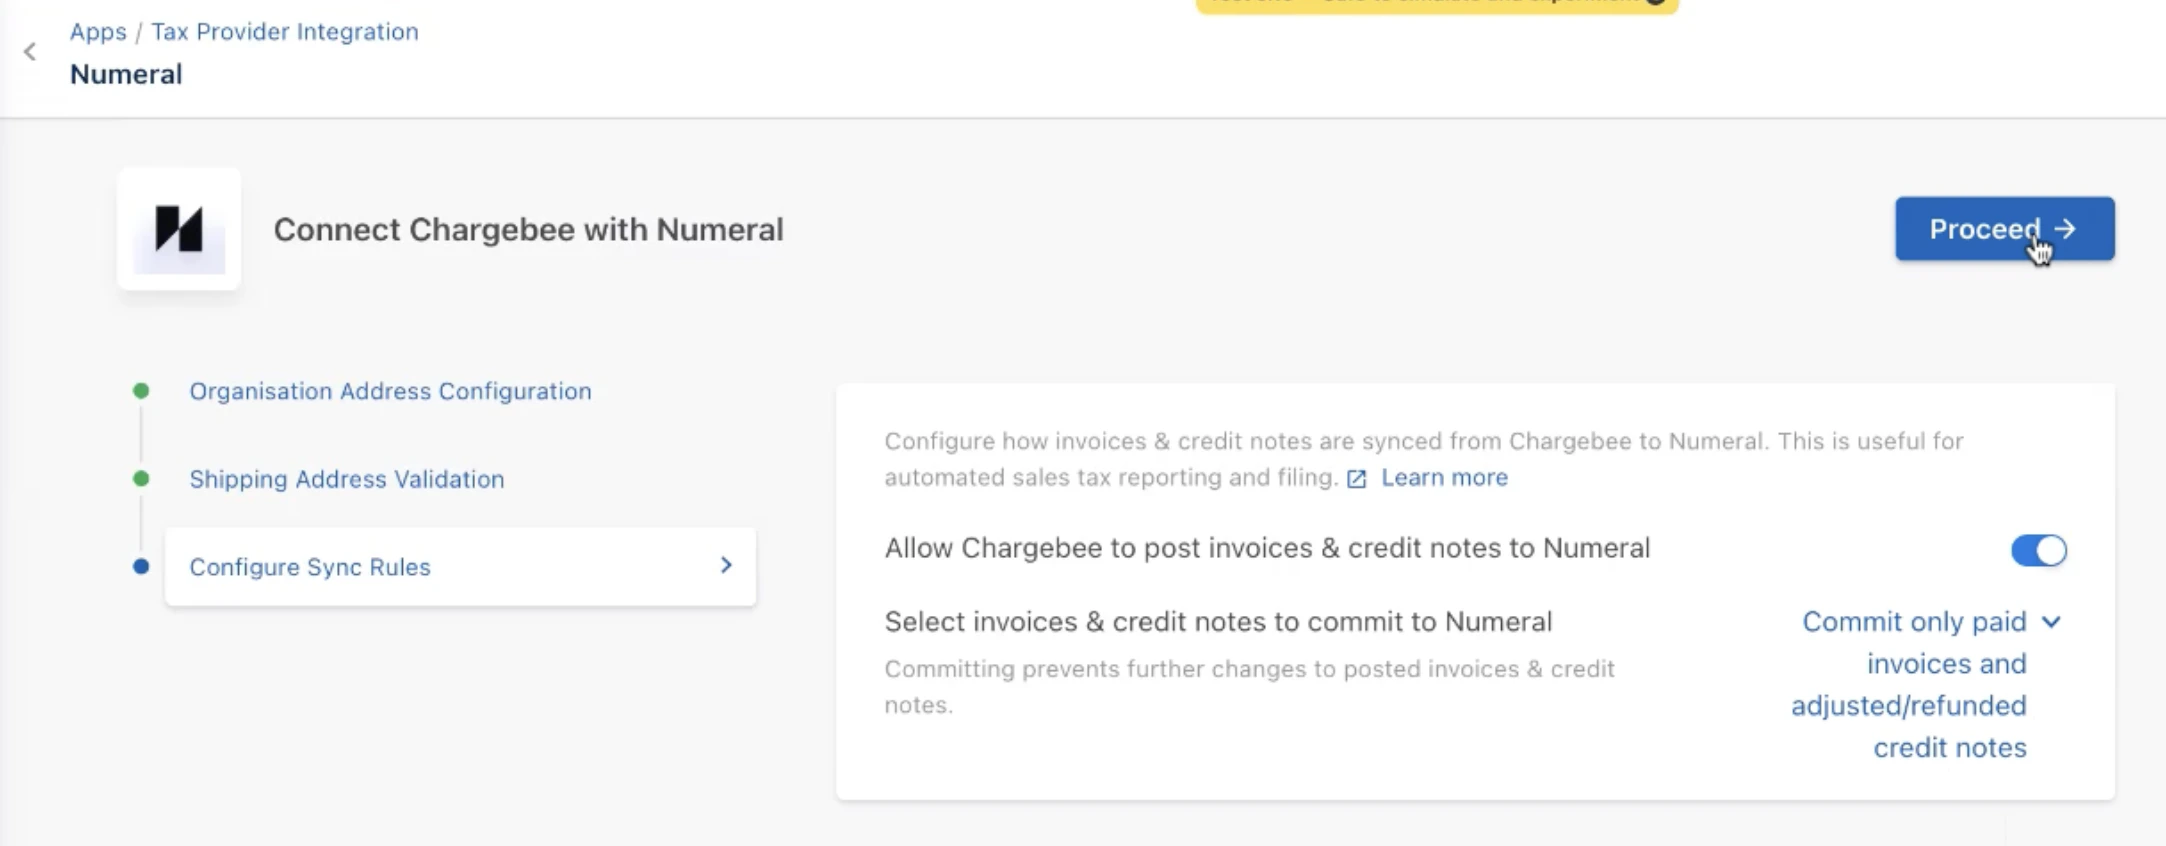
 7. Your organization address should auto-populate. Click **Proceed**. Toggle on **Validate customer shipping addresses with Numeral**. In the last step, toggle on **Allow Chargebee to post invoices & credit notes to Numeral**, then select **Commit only paid invoices and adjusted/refunded credit notices** and click **Proceed**.
 8. In the next window, validate your existing addresses. Select the regions you have customers in and click **Run Check**.
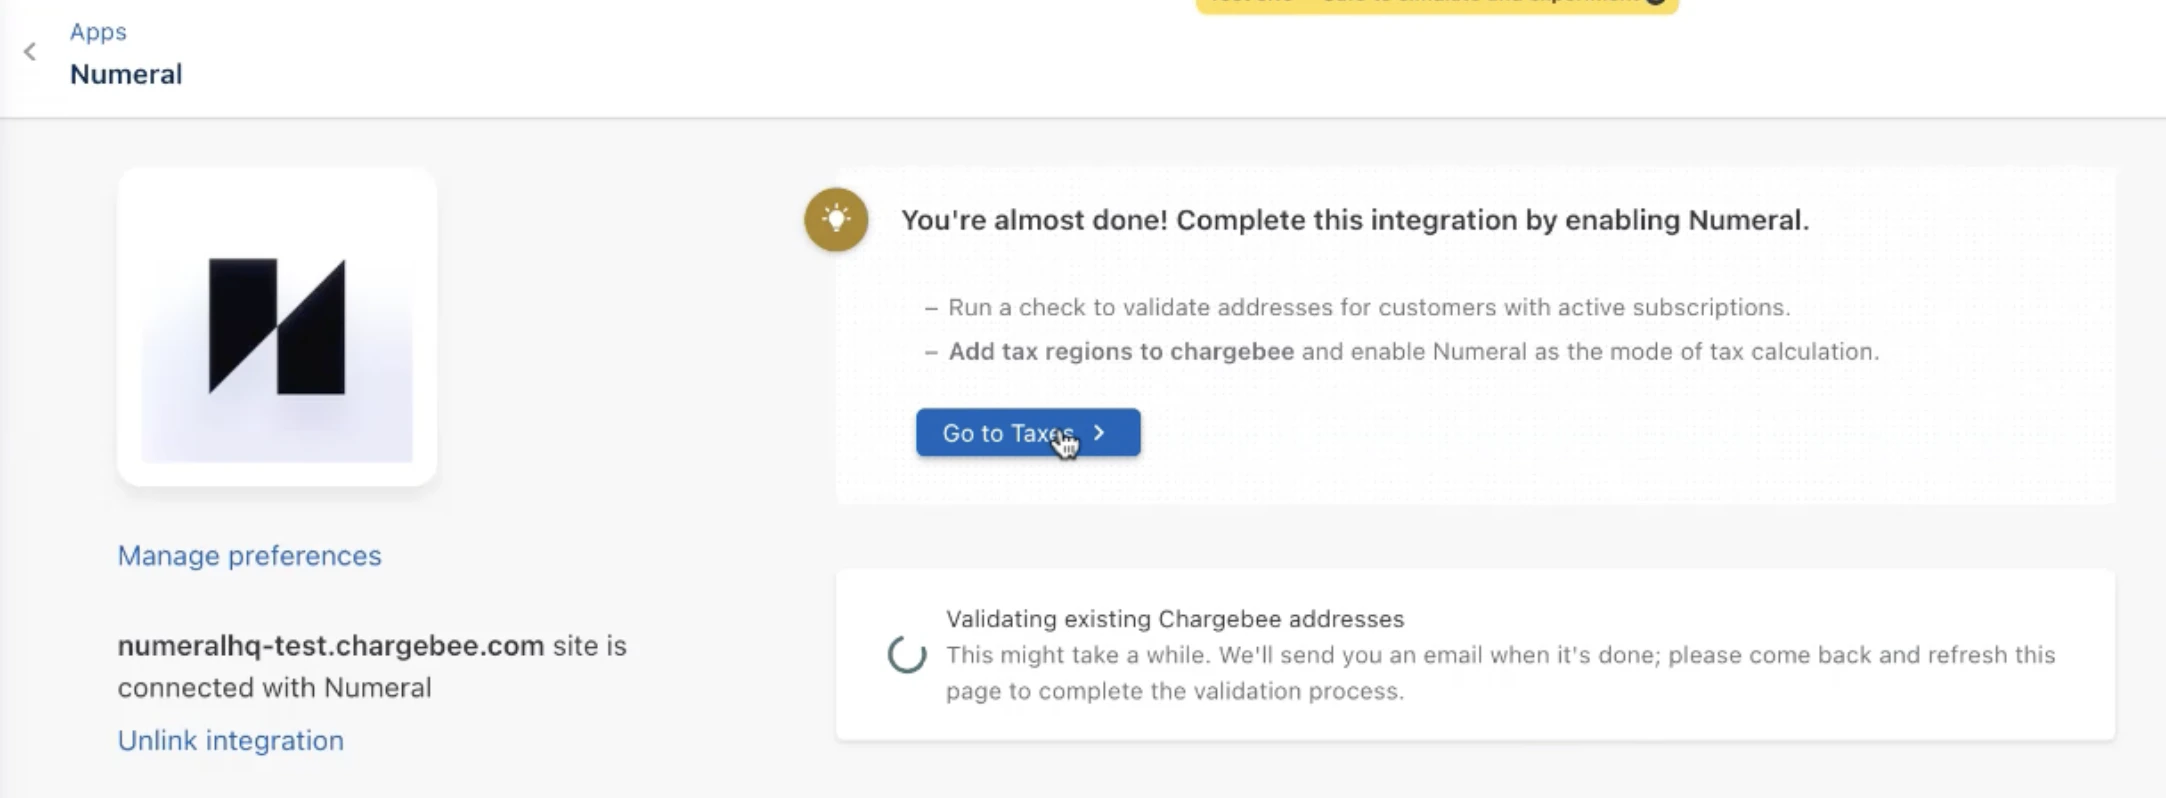
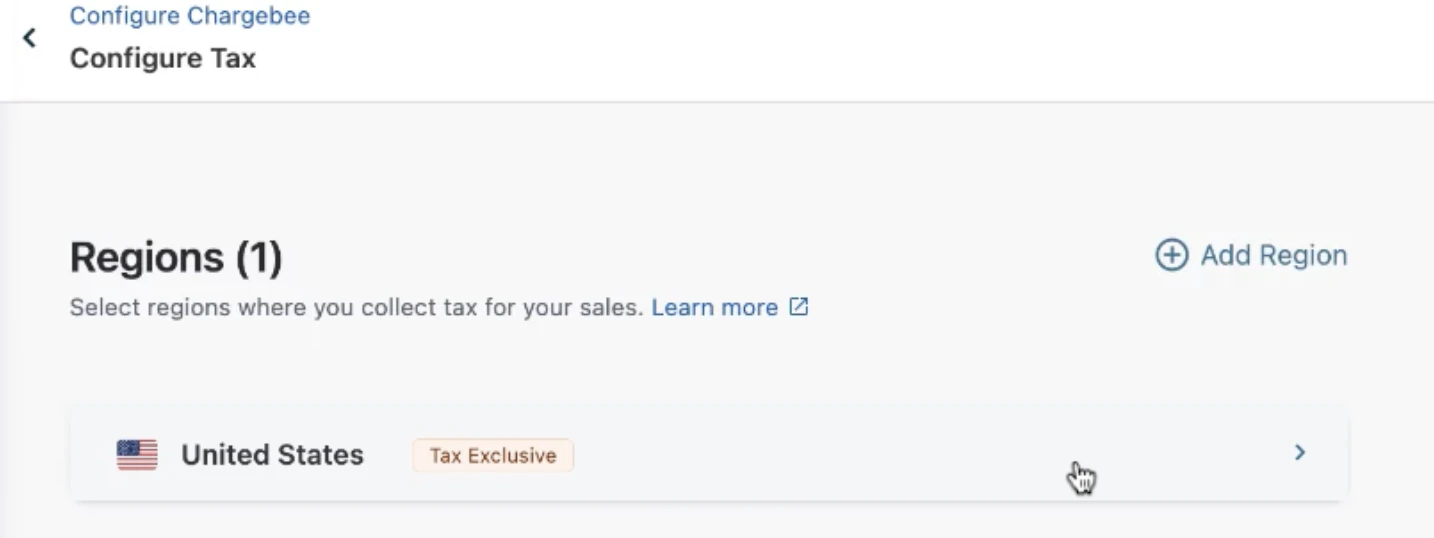
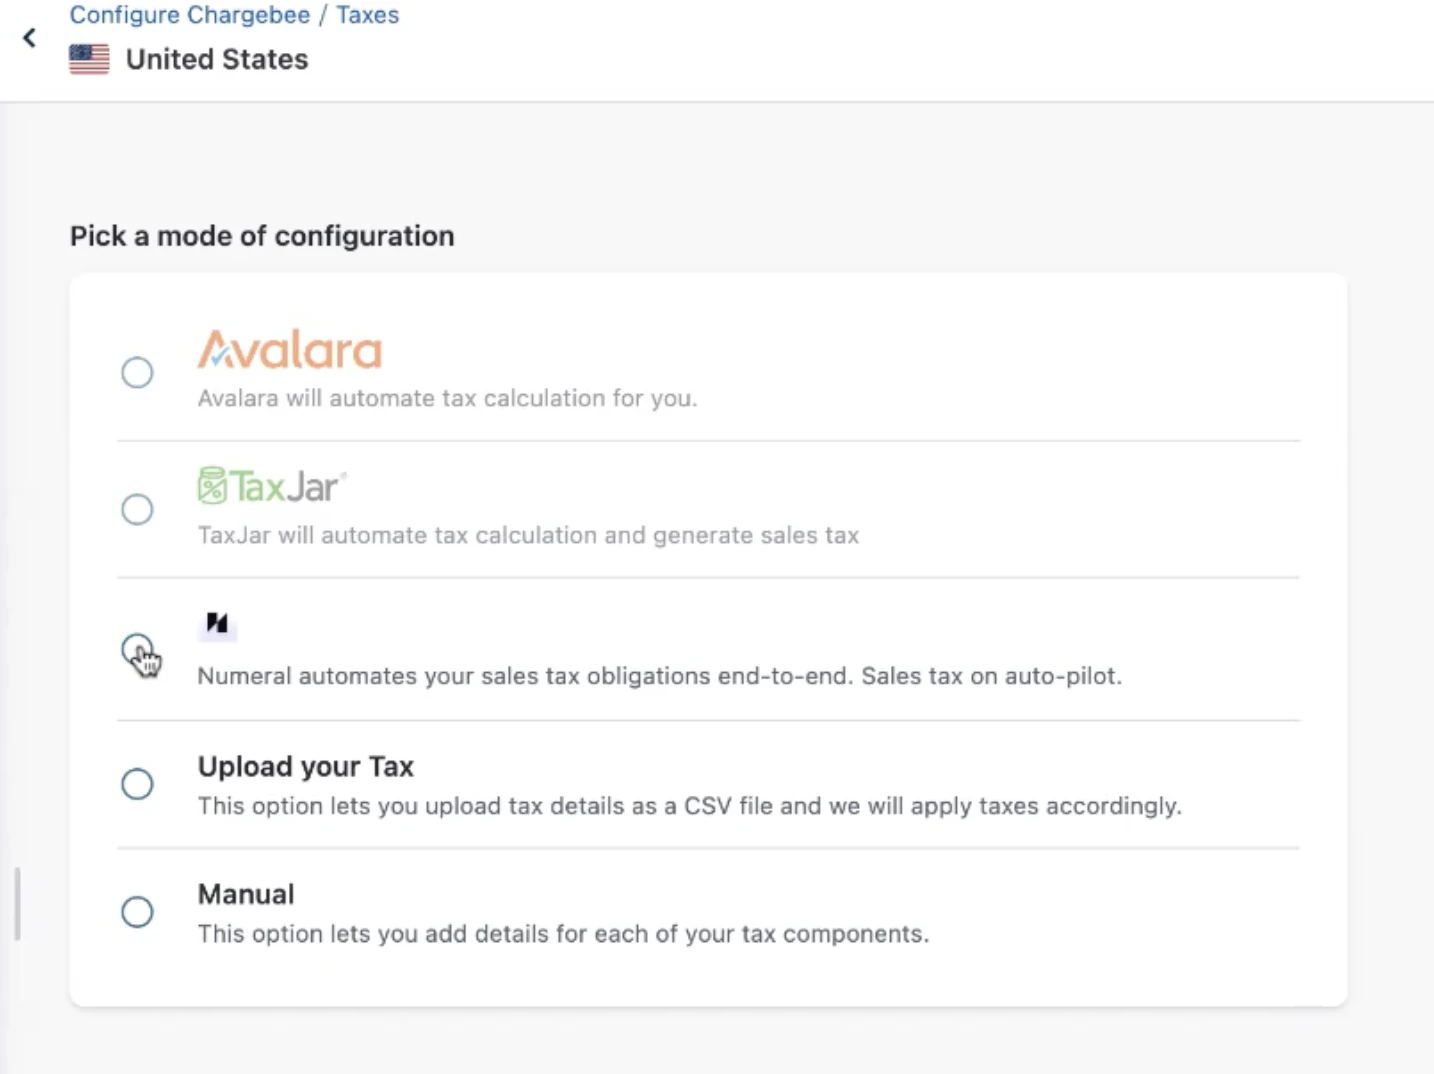
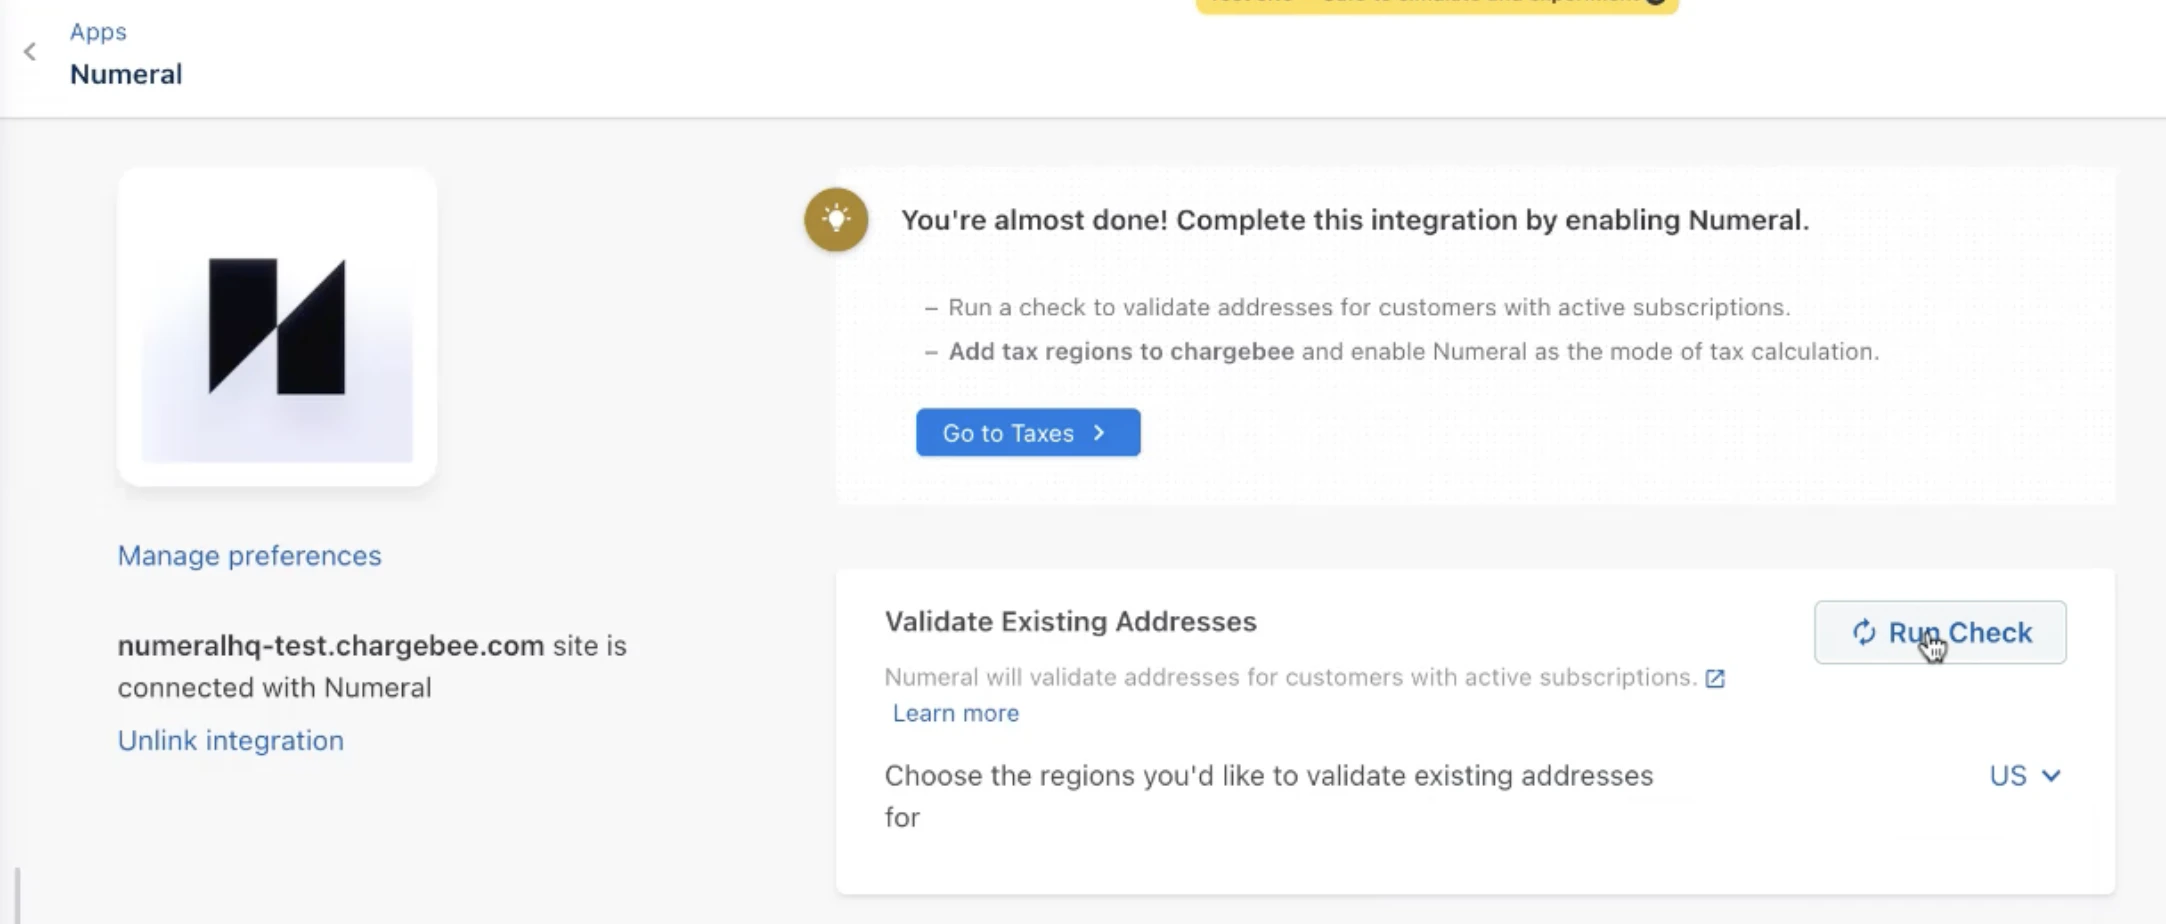 9. While the check is loading, finalize the integration by clicking **Go to Taxes**. Select the regions where you need to collect sales tax and select **Numeral**.
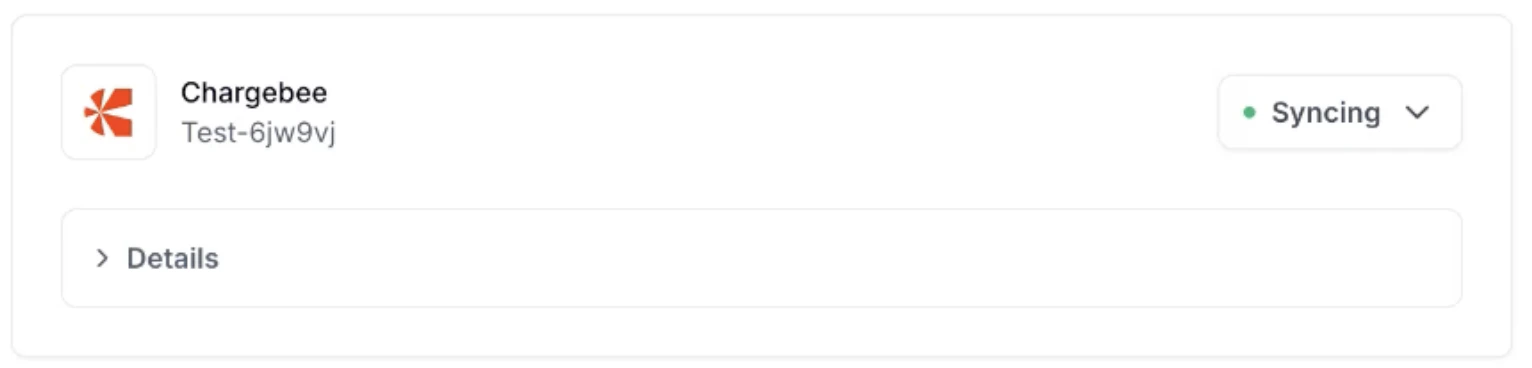
 10. Navigate back to Numeral and click **Continue**. Your Numeral ↔ Chargebee connection is now complete. You will see a green dot next to Chargebee indicating the integration is syncing.
 A [step-by-step video](https://www.loom.com/share/b1282a7b15c94df88cd77de0f3dbcc50?sid=9b21336b-ab06-4871-91d1-f6d4fab4c81d) is available reviewing the full setup process.
***
## Generating Your First Invoice
To test your integration, create a test invoice for a client in a state you're registered for sales tax:
1. Navigate to the **Subscriptions** tab and click **+ Create Subscription** in the top right corner. Select your customer.
2. Choose your **Product Family**, click **+ Add Plan**, and select the plan you'd like to charge.
3. Under **Invoicing Options**, configure the following:
* Select **Generate all renewal invoices in pending state**
* Select **Also generate first invoice in pending state**
A [step-by-step video](https://www.loom.com/share/b1282a7b15c94df88cd77de0f3dbcc50?sid=9b21336b-ab06-4871-91d1-f6d4fab4c81d) is available reviewing the full setup process.
***
## Generating Your First Invoice
To test your integration, create a test invoice for a client in a state you're registered for sales tax:
1. Navigate to the **Subscriptions** tab and click **+ Create Subscription** in the top right corner. Select your customer.
2. Choose your **Product Family**, click **+ Add Plan**, and select the plan you'd like to charge.
3. Under **Invoicing Options**, configure the following:
* Select **Generate all renewal invoices in pending state**
* Select **Also generate first invoice in pending state**
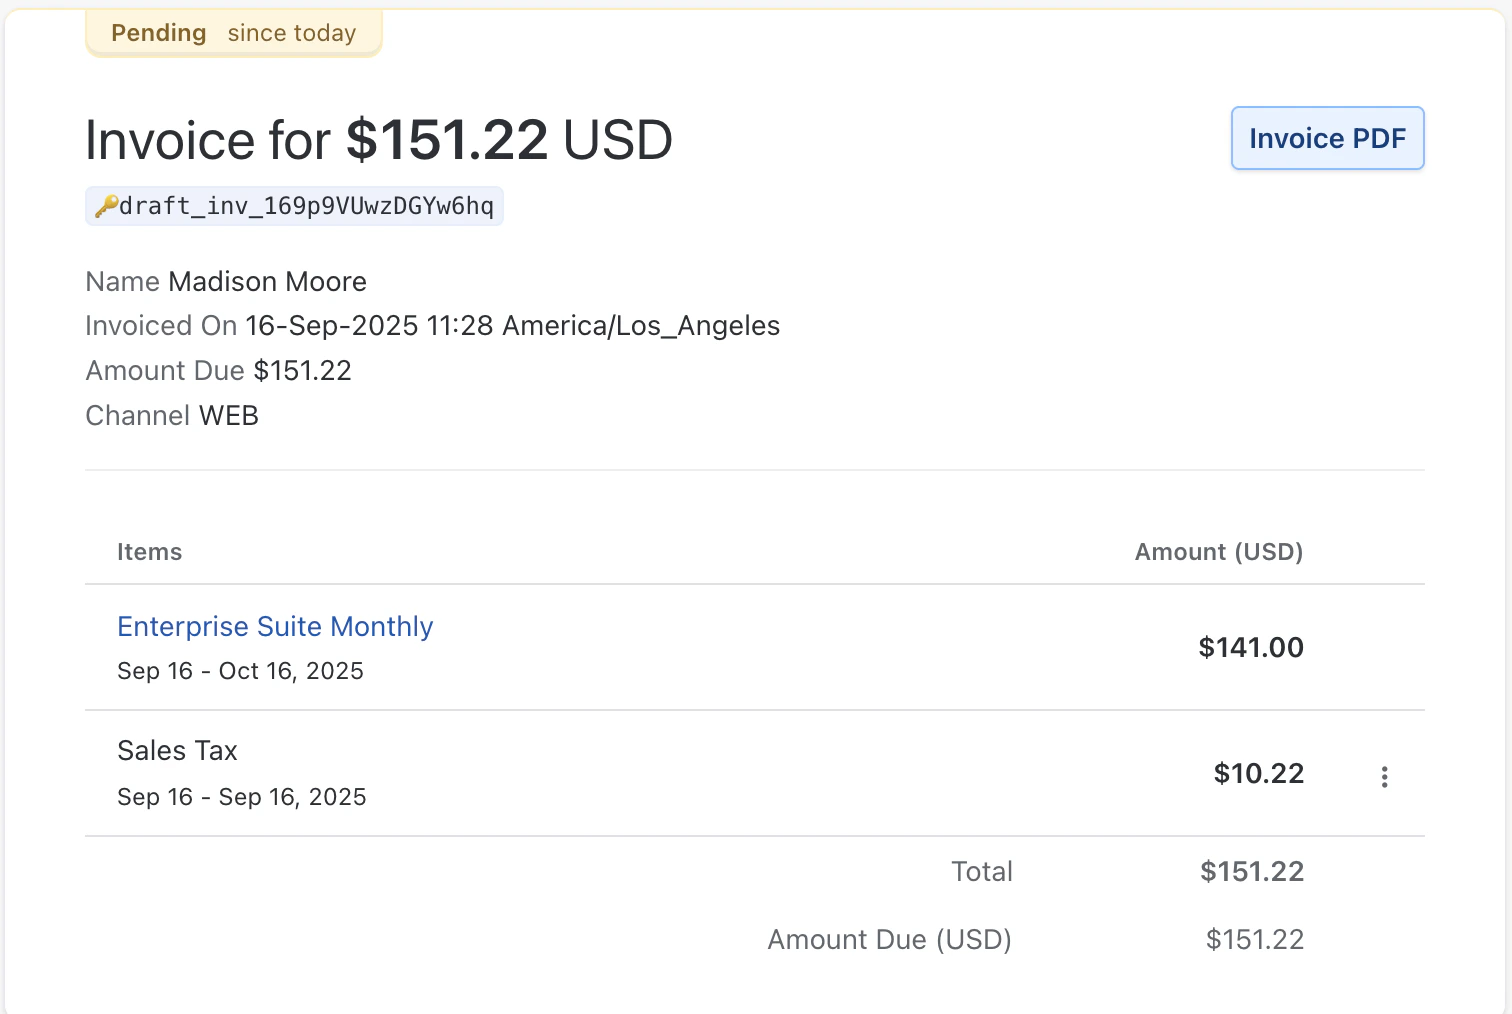
 Generating invoices in pending state is required to give Numeral's tax engine time to apply the correct tax rate before the invoice is finalized.
4. If the client doesn't have a shipping address, select **Same as billing address**.
5. Click **Create** in the top right corner.
6. To review the new invoice, navigate to **Invoices & Credit Notes > Invoices** and click the new invoice.
Generating invoices in pending state is required to give Numeral's tax engine time to apply the correct tax rate before the invoice is finalized.
4. If the client doesn't have a shipping address, select **Same as billing address**.
5. Click **Create** in the top right corner.
6. To review the new invoice, navigate to **Invoices & Credit Notes > Invoices** and click the new invoice.
 A [step-by-step video](https://www.loom.com/share/3cb352d664a640c39cead1b1e8aa3787?sid=2e6d37cc-7dec-441d-a79e-71e70f67ed76) is available reviewing the invoice creation process.
***
## Timeline Considerations
If you're already using Chargebee to apply tax rates to invoices, coordinate with your Onboarding Manager to confirm your **go-live date** with Numeral.
For example, if Numeral will begin managing your sales tax registrations in **August**, meet with your Onboarding Manager on **August 1** to turn off Chargebee tax calculations and activate Numeral's tax engine.
* Numeral's tax engine will not collect tax before your confirmed start date.
* Numeral only collects tax in states where your company is registered.
Confirm your start date(s) and registered states by navigating to the [Jurisdictions](https://dashboard.numeralhq.com/jurisdictions) tab in your Numeral account.
***
## Confirming Your Configurations
On your go-live call, your Onboarding Manager will confirm that **Chargebee tax calculations are disabled**. You can also verify this on your own:
**How to Turn Off Chargebee's Tax Calculations:**
1. Log in to your Chargebee account.
2. Navigate to the **Settings** menu on the left-hand side.
3. Select **Configure Chargebee**.
4. Go to the **Taxes** section.
5. Disable the feature for automatic tax calculation on your dashboard.
***
## Product Categorization
Product categories in Chargebee do **not** carry over to Numeral — categories must be set up directly within your Numeral account.
Work with your Onboarding Manager to set up product categories within Numeral. Once configured, Numeral's tax engine uses these categories to accurately determine taxability.
**How to review or update product categories in Numeral:**
1. Log into your Numeral dashboard.
2. Navigate to the [Developers tab](https://dashboard.numeralhq.com/developers). If this tab isn't visible, contact your Onboarding Manager.
3. Select **Products**.
4. Edit products individually or create new products as needed.
***
## Customer Exemptions
If a customer should be exempt from sales tax, mark them as exempt directly in Chargebee:
1. Navigate to **Customers** on the left-hand side.
2. Click on the customer's name to open their profile.
3. Select **Edit Customer** in the top right corner.
4. Scroll down to **Tax Details** and check **This customer is exempt**.
A [step-by-step video](https://www.loom.com/share/3cb352d664a640c39cead1b1e8aa3787?sid=2e6d37cc-7dec-441d-a79e-71e70f67ed76) is available reviewing the invoice creation process.
***
## Timeline Considerations
If you're already using Chargebee to apply tax rates to invoices, coordinate with your Onboarding Manager to confirm your **go-live date** with Numeral.
For example, if Numeral will begin managing your sales tax registrations in **August**, meet with your Onboarding Manager on **August 1** to turn off Chargebee tax calculations and activate Numeral's tax engine.
* Numeral's tax engine will not collect tax before your confirmed start date.
* Numeral only collects tax in states where your company is registered.
Confirm your start date(s) and registered states by navigating to the [Jurisdictions](https://dashboard.numeralhq.com/jurisdictions) tab in your Numeral account.
***
## Confirming Your Configurations
On your go-live call, your Onboarding Manager will confirm that **Chargebee tax calculations are disabled**. You can also verify this on your own:
**How to Turn Off Chargebee's Tax Calculations:**
1. Log in to your Chargebee account.
2. Navigate to the **Settings** menu on the left-hand side.
3. Select **Configure Chargebee**.
4. Go to the **Taxes** section.
5. Disable the feature for automatic tax calculation on your dashboard.
***
## Product Categorization
Product categories in Chargebee do **not** carry over to Numeral — categories must be set up directly within your Numeral account.
Work with your Onboarding Manager to set up product categories within Numeral. Once configured, Numeral's tax engine uses these categories to accurately determine taxability.
**How to review or update product categories in Numeral:**
1. Log into your Numeral dashboard.
2. Navigate to the [Developers tab](https://dashboard.numeralhq.com/developers). If this tab isn't visible, contact your Onboarding Manager.
3. Select **Products**.
4. Edit products individually or create new products as needed.
***
## Customer Exemptions
If a customer should be exempt from sales tax, mark them as exempt directly in Chargebee:
1. Navigate to **Customers** on the left-hand side.
2. Click on the customer's name to open their profile.
3. Select **Edit Customer** in the top right corner.
4. Scroll down to **Tax Details** and check **This customer is exempt**.